Showing posts with label Anniversary. Show all posts

Wednesday, 2 February 2022

Timeless Love

“Timeless Love”

 Hello Friends,

I am here with very lovely card filled with all my love for my Husband. we are completing 25 years of togetherness on 5th February 2022. 

Heartfelt Creations Products:

Simply Classic Oval Frame DieHCD2-7382

Simple Moments Timepiece Cling Stamp SetHCPC-3972

Simple Moments Timepiece DieHCD1-7380

Timepiece Sentiments Cling Stamp SetHCPC-3973

Moments in Time Paper CollectionHCDP1-2134

Clematis Cling Stamp SetHCPC-3954

Clematis DieHCD1-7355

Decorative Circle Frames DieHCD2-7306

Peony & Sunflower Banner Cling Stamp SetHCPC-3970

Peony & Sunflower Banner DieHCD1-7378

Deluxe Flower Shaping Paper Pack of 25 - WhiteHCPP1-468

Deluxe Flower Shaping KitHCST1-401

Rajni Chawla's Crystal ClearPGM15015

For more tips on creating with Heartfelt Creations dies, watch YouTube tutorials from the link below

Simple Moments Timepiece Die

Simple Classic Oval Frame Die

Peony & Sunflower Banner Die

Clematis Die

Other products: Archival Ink- Black, Cactus flower, leaf Green, Olive green, Score board, White cardstock and Gold Cardstock. Glossy accent, Foam Tape, Hot Melted Glue, White Satin ribbon, Glossy accent, Floral green tape, Floral wire, Rock candy stamens, Scissor.

Instructions: Ready gate fold card measuring 5" × 7". Take a piece of white cardstock measuring 14" × 5", score on 3.5" and 10.5" from longer side. Fold along the score lines and create a gatefold card. Cut both folds of card and 2 pattern paper using Simply Classic Oval Frame No.1 die. Adhere on card as pictured also adhere inside of the gate fold too. Die cut vellum paper using the No.2 decorative die then cut into half. Die cut 2 golden and 1 white using No.3 and No.4 frame Simply Classic Oval Frame Die, glue one gold and white die cuts together, slightly offset, and cut into half. Adhere on card as pictured.

Stamp sunflower on Deluxe Flower Shaping Paper using Peony & Sunflower Banner with Black archival ink and cut with coordinating dies. Color using pencil colors.

Take strips of gold cardstock 1 2/8” wide and white cardstock 1” wide glue them together and adhere on card to create belly band as pictured. Cut 2 white and 1 gold pieces using Simply Classic Oval Frame Die No.5 and distress with archival olive green. Cut one smaller ovel (die from my stash) out of patter paper, Die cut the decorative using No.6 Simply Classic Oval Frame Die set. Die cut Eyelet Circle from Decorative Circle Frames die. Stamp sentiments using Timepiece Sentiments Cling Stamp set in embossing ink on white oval die cut and heat set with gold embossing powder and cut circle using HCD1- 7380 No.5 die. Adhere using foam tape as pictured.

Cut pieces of patter paper and vellum paper measuring 5 7/8"×7 7/8", glue them inside the card base, also adhere No.4 golden decorative die cut from simple classic oval frames in centre. Stamp the sentiment from the HCPC-3844 For My Friend Sentiments Cling Stamp set in embossing ink on white oval die cut and heat emboss with gold embossing powder. Distress the edges with cactus flower archival ink. Adhere with foam tape on decorative die. Die cut the leaves using the leaf die from the Simply Classic Oval Frame Die out of gold and white cardstock and adhere offset all four corners.

Stamp 5 medium flowers with archival cactus flower and 5 small flowers and 2 leaves with archival leaf green on Deluxe Flower Shaping Paper from HCPC-3954Clematis die, cut with coordinating die, color with the same. Shape using back of the golf tool. pierce the centers and insert Rock Candy stamens to create bud. Tie a bow with satin ribbon as pictured.

Arrange flowers and leaves on card and glue using hot melted glue. Add Rajni Chawla Crystal Clear using glossy accent glue.


I hope you enjoyed the tutorial.
Thanks for stopping by
Hugs
Madhu Bairoliya.

Blog: https://thecraftplanet1.blogspot.com/
Instagram: https://www.instagram.com/madhu.bairoliya/
Facebook: https://www.facebook.com/craftplanet1
You Tube: https://www.youtube.com/channel/UC9wvBSioU9AyVN_INLcTk9g

Tuesday, 1 February 2022

More Than A Friend

"More Than A Friend"


Hello Friends! Lets get creative and create some cards using the best products in the crafting industry. Once finished I can guarantee a wave of pride and happiness coming your way, so let's not delay and get started.

Heartfelt creations Products:

Simply Classic Rectangle Frame DieHCD2-7383

Clematis DieHCD1-7355

Clematis Cling Stamp SetHCPC-3954

Floral Banners Paper CollectionHCDP1-2133

Floral Shoppe Fillers Cling Stamp SetHCPC-3933

Floral Shoppe Fillers DieHCD1-7331

Holly Berry Spray Cling Stamp SetHCPC-3959

Holly Berry Spray DieHCD1-7360

Leafy Accents Cling Stamp SetHCPC-3835

Leafy Accents DieHCD1-7193

3D Leafy Accents Shaping MoldHCFB1-467

For My Friend Sentiments Cling Stamp SetHCPC-3844

Deluxe Flower Shaping Paper Pack of 50 - WhiteHCPP1-475

Deluxe Flower Shaping KitHCST1-401

Rajni Chawla's Crystal ClearPGM15015

Designer Dries Clear Adhesive159723

For more tips on creating with Heartfelt Creations dies, watch YouTube tutorials from the link below

Simple Classic Rectangle Frame Die

How to create the Climbing Clematis & layer them on a Decorative Card

Other Products Archival Ink Seafarer, Pink Peony, Leaf Green, Coffee, White card stock, Gold Cardstock, Brown Cardstock, Trimmer, Glossy accent, Gold Rock candy stamens, Score Board, Hot Glue Gun, Foam Tape, Scissor. 


Instructions: Ready tent fold card measuring 5.5" × 7.5". Take a piece of white cardstock measuring 11" × 7.5", score on 5.5". Fold along the score lines and create a tent fold card base. Mat with brown and white cardstock, then designer paper (a slight shade of pink peony archival ink has been used), adhere with dimensional tape. All mat paper should be 2/8” smaller than the bottom. Glue golden and blue pattern paper (shaded with pink pony) inside the card which is 2/8” smaller than the card base.

Further cut 2 white and 2 gold decorative frames using die No. 4. To create a longer decorative frame cut paper a little longer than your target length. Placing your die at one end of the paper. Place your cutting plates so that they cover only the portion you want to cut. Run through the die cutting machine. Reposition the die so it is lined up with the original cut portion. Place the cutting plate so only the portion you want to cut will cut through the paper. (The original size of the frame is approx. 4” but with this step the actual length of your final cut will be 5.5” approximately)

Create 2 designer frames with all die cut. Slightly off set. Glue all pieces on top and inside of the card using dimensional tape as pictured.

Cut a strip of vellum paper, 1 1/8" wide. Stamp sentiment cling stamp set HCPC-3344 with embossing ink and heat set using golden embossing powder. Apply pink peony ink from back. Glue strip with golden and white mat as pictured.    

Stamp Clematis flower on deluxe flower shaping paper with embossing ink and heat set using white embossing powder. Color with Seafarer archival ink. Color some small flowers with pink peony for buds and cut with coordinating dies. Stamp smallest Clematis with leaf green and cut with coordinating die. Mist with water and Shape them using ball tool. Pierce the center of flower. Add Golden Rock candy stamens. Create 3 pink and 3 blue buds as pictured. Stamp leaves from Leafy Accents stamp with leaf green. Stamp Floral Shoppe Fillers stamp using leaf green and pink peony ink. Also stamp some leaves from Holly Berry stamp using Coffee archival ink. Cut leaves with their coordinating dies. Cut some golden leaves using Floral Shoppe Fillers die too.

Arrange flowers and leaves on card using hot melted glue. For a finishing look, apply Rajni Chawla Crystal Clear on flowers and leaves using designer dries clear adhesive.

Arrange flowers, buds and leaves on card in the desired manner and glue them using hot melted glue

Enjoy the pictures attached below.


I hope you enjoyed the tutorial.
Thanks for stopping by
Hugs
Madhu Bairoliya.

Blog: https://thecraftplanet1.blogspot.com/
Instagram: https://www.instagram.com/madhu.bairoliya/
Facebook: https://www.facebook.com/craftplanet1
You Tube: https://www.youtube.com/channel/UC9wvBSioU9AyVN_INLcTk9g

Monday, 2 March 2020

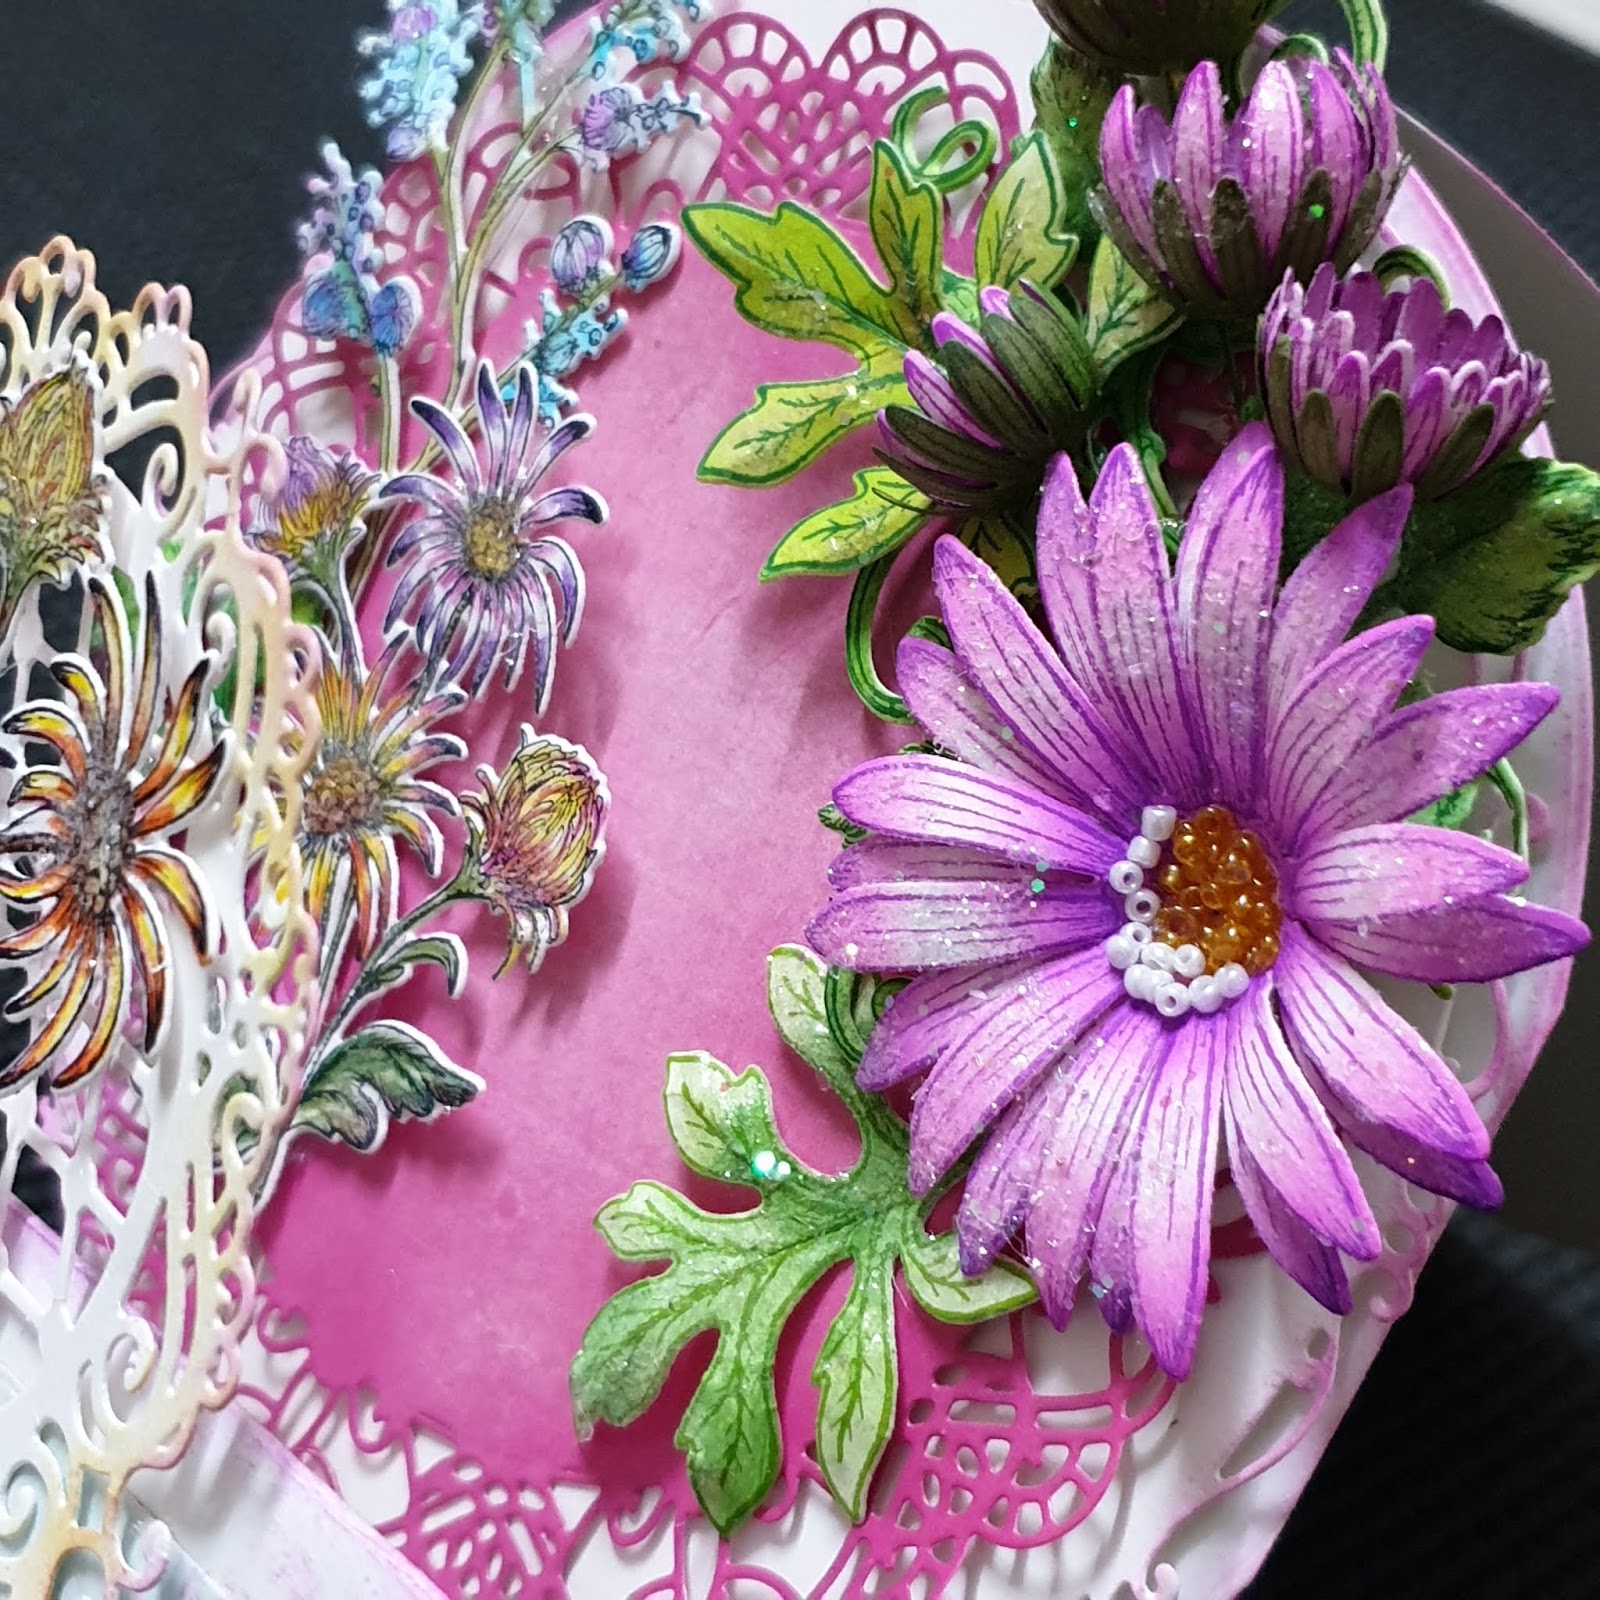
Glittery Aster's circle world!

Glittery Aster’s Circles World! 

Hello friends!
I am here with folded circle easel birthday card with some tips.


HC PRODUCTS USED: 
Rounded Window Frame Die, HCD1-727

Other products: Icraft flower shaping paper super white, white cardstock, pink card stock, pearls, glass beads, wire, hot glue, dries clear glue,
Inks: Archival – Cactus Flowers, Majestic Violet, jet Black, Library Green, Leaf Green, Memento: Lilac Posie, Colour pencils, Zig Marker

Products can be buy from
USA  Heartfelt Creations
INDIA crafterscorner
INDIA   Icraft Flower Paper

Note:  At the end of blog you will get some tips.


For more tips on creating with the Window Scene cards & dies, watch the tutorial at 

For more tips on creating with the Wild Aster Collection, watch the tutorial at https://youtu.be/1mriCKqh-Ac.

Instructions: Take a square card base 6” x 6”. Cut using Rounded Sunlight Window die extending over the top of the fold of the card. Run the card through die cutting machine so when the card is opened it will still be intact. Now cut 3 circles using same window die. Fold all 3 circles into half. Attach them together with the help of hinges. Also attach with 6x6 circle card base. Now card base is ready. See the picture it looks like this.


Cut circle card mats from Window Scenes Paper Collection using Rounded Sunlight window die. Cut them into half. To give some more creative look use 2nd large doily die cut as a stencil from Rounded Window Frame die. Do stenciling using Rounded window frame 2nd die as stencil with pink posie memento ink. Adhere on folded card mats. See the picture.


Now cut 3 dollies from white cardstock using 3rd and 4th doily from Rounded Window frame die. Distress the edged using sunflower and cactus flower archival inks. Cut one doily from deep pink card stock using 2nd largest die from Rounded Window Frame die. And distress the edge using memento Lilac Posie ink ans yellow ink. Glue these dollies on folded card as shown in the picture. Add half small pearls on doily net.

Stamp aster flowers on flower shaping paper using cactus flowers and majestic violet archival ink and cut with coordinating dies. Sponge flowers using cactus flower, shape flowers using ball tool. Layer big flowers and add yellow and white glass beads in center using clear adhesive. Create one flower inward fold as shown in picture Shape the small asters into bud form using two petals and single petal, and pair with green aster for a realistic bud look with wire stamens. For green aster stamp on green card stock with Library Green. Cut with coordinating dies.    
Stamp aster leaves using library green ink and cut with coordinating die. Paint leaves using leaf green ink. Shape leaves using ball tool. Stamp leaves with Leafy Accents Cling stamp set with Library Green, color with leaf green, cut with coordinating dies. Shape with 3D Leafy Accent Shaping Mold.   
Stamp image with Wild Aster Spray Cling Stamp Set with Black Archival and color with pencil color and zig marker. Cut with coordinating die.
Add crystal clear on flowers, leaves and sprays using dries clear glue.
Arrange flowers, leaves and sprays on all layers and glue them with hot melted glue. Add tag.
Enjoy more pictures.


Tip: for fast working I washed back of sheet with green water or acrylic paint. Like pictures...


For aster flowers, painted thin mauve paint to the back of petals and buds petals. Like picture...

If you liked put some comments in comment box.

Thanks for stopping By.
Hugs
Madhu Bairoliya


Sunday, 9 February 2020

DogWood Love Roses

DogWood love Roses!

HC products used:
Leafy Accents Die, HCD1-7193
Eyelet Oval Die,  HCD1-776
Classic Wedding Bells Die, HCD1-7143
Classic Wedding Bells Cling Stamp Set, HCPC-3789
Decorative Oval Die , HCD1-762
Rajni Chawla's Crystal Clear, PGM15015

Products can be buy...
USA : Heartfelt Creations
INDIA Crafters Corner


Other Products: White card stock, Glitter hot glue, dries clear glue, wire stamens, 


Instructions: 6x6 tent fold card. 

Score front panel from back at every 1/2" interval and create background.  Distress The edges with archival cactus flower. Stamp image using Classic Wedding Bells Cling Stamp Set and cut with coordinating die . color using Zig marker brush pen. Stamp the dogwood flowers using archival ink Plum color with magenta hue and cactus flower. Shape them using deluxe shaping kit ball tools. Create big rose using small to big petals. Create small flower and bud too. Stamp leaves using leafy accent stamp with library green and color with memento Bamboo Leaves and archival leaf green and cactus flower. Shape them using 3D leafy accent shaping mold. Now adhere both Oval die cuts as pictured. Arrange the flowers and leaves with hot glue. add sentiment in 3D look with hot glue. Add glitters using dries clear glue.
some more pictures bellow...


Thanks for stopping by..
Hugs
Madhu Biroliya


Friday, 7 February 2020

Special Hugs on Belly Band

 Special Hugs on Belly Band!🤗🤗

Hello Friend!!
I am here with very lovely card fill with all my love for my Husband. we completed 23 years of togetherness on 5th February 2020. He was super happy to get this lovely card. 💗💝

HC products:
Rounded Sunlight Window Die  HCD1-7272
Classic Rose Die, HCD1-7110
Classic Rose Cling Stamp Set, HCPC-3752
Classic Rose Paper Collection, HCDP1-270
3D Rose Shaping Mold, HCFB1-462
Leafy Accents DieHCD1-776

Leafy Accents Cling Stamp Set, HCPC-3835 
Leafy Accents Shaping Mold, HCFB1-467

Rajni Chawla's Crystal ClearPGM15015

Other Products: white card stock for flowers and card base,hotglue, dries clear glue, wire stamens, micro mini pearls, satin twin, satin ribbon, 4mm eyelets
Inks: Archival Ink; plum, Leaf Green, Library Green, Sunflower, Lilac posies, Cactus Flower


Ready card measures 6” × 6”. First cut 6x6 card stock. To make interlocking cards take white cardstock
cut 2 circles using Rounded Sunlight Window Die. Score both circles from center and make them 4 half
circles. Cut 4 hinges and add one part with half circle and another with base. as shown in pictures. 


Cut 4 half circles using die cuts from window scene paper collection. Adhere them on created interlocking card base. Cut Half circle decorative die cuts from white cardstock using dies. Distress die cuts with cactus flower ink and mat them on top as shown. 


Cut 4 half circles using die cuts of scenes from window scene paper collection. Adhere them inside of interlocking card half circles and one on base. Make matted belly band and add make holes using eyelets at both ends of band. Make pocket using border die cut for tag as shown in picture.


For flowers stamp Classic Roses on white flower paper with archival Plum multiple times. Cut with coordinating die. Color with plum, Lilac Posies and Cactus Flower front and back both. For fillers add Archival Sun Flower. Shape them using shaping mold. For big rose use 3 big flowers 2 medium flowers and 2 flowers 3rd big. Add micro pearls using dries clear glue. Add glitter too. Stamp Leaves on white paper using Leafy accent stamp set with archival Library Green and cut them coordinating dies. color using Leaf Green  and Cactus flower. Shape them using Leafy Accents 3D Shaping mold. Add glitters with dries clear glue. Arrange all flowers and leaves on a band as pictured


And glue it on Belly Band with hot glue , but keep in mind pocket should not be glued. Add small rose bud, satin twin and sentiment on tag. Tie white satin ribbon in eyelets holes as pictured.


Stamp Rose image  on white paper and color with pencil color and water color brush pen. Cut one heart using heart dye cut from my stash. Distress the edges with Cactus Flower and adhere it with foam tape. hot glue color image Add picture or sentiment in Heart shape.


Some more pictures are here with closeup look 


Hope you enjoyed the tutorial.

Thanks for stopping by
Hugs
Madhu Biroliya